-
[Flutter] 검색창(SearchBar) 위젯 활용 예시Programing/Flutter 2024. 1. 21. 16:54반응형
검색창은 많은 어플에서 사용하는 요소인 만큼,
플러터에서는 검색창 위젯을 기본으로 제공하고 있습니다. (Flutter 공식문서)

그런데 사용하려고 보면 parameter가 매우 많습니다.

최소단위부터 하나씩 확인 해봅시다.
시작
body에 넣고 Padding으로 감싼 뒤 시작하겠습니다.
import 'package:flutter/material.dart';

class TestScreen extends StatelessWidget {
  const TestScreen({super.key});

  @override
  Widget build(BuildContext context) {
    final ThemeData themeData = ThemeData(useMaterial3: true);

    return MaterialApp(
      theme: themeData,
      home: Scaffold(
        appBar: AppBar(title: const Text('Search Bar Test')),
        body: Padding(
          padding: const EdgeInsets.all(10.0),
          child: SearchBar(),
        ),
      ),
    );
  }
}
basic 기본 사용
SearchBar()
leading 위젯 추가
Widget을 input으로 넣어줍니다.
보통 Icon이나 IconButton, 기타 이미지가 들어가는 경우가 많습니다.
SearchBar(
	leading: Icon(Icons.search),
)
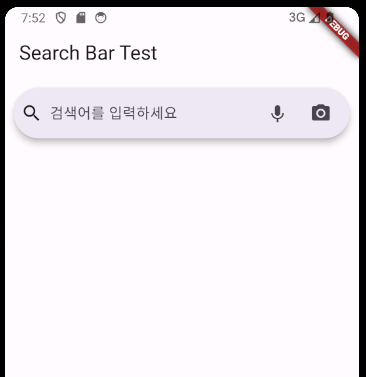
trailing 위젯 추가
Widget이 input으로 넣어줍니다.
list로 넣어줘야 합니다.
SearchBar(
    trailing: [
      IconButton(
        icon: const Icon(Icons.keyboard_voice),
        onPressed: () {
          print('Use voice command');
        },
      ),
      IconButton(
        icon: const Icon(Icons.camera_alt),
        onPressed: () {
          print('Use image search');
        },
      ),
    ],
  ),
backgroudColor 배경색 설정
MaterialStateProperty로 넘겨줘야 합니다.
SearchBar(
    trailing: [Icon(Icons.search)], // 너무 허전해서 추가했습니다.
    backgroundColor: MaterialStatePropertyAll(Colors.yellow),
  ),
shadowColor 그림자색 설정
MaterialStateProperty로 넘겨줘야 합니다.
SearchBar(
    trailing: [Icon(Icons.search)],
    shadowColor: MaterialStatePropertyAll(Colors.red),
  ),
overlayColor 하이라이트 색깔 설정
선택했을 때 나타나는 활성화 색상을 설정해줄 수 있습니다.
MaterialStateProperty로 넘겨줘야 합니다.
SearchBar(
    trailing: [Icon(Icons.search)],
    overlayColor: MaterialStatePropertyAll(Colors.red),
  ),
elevation 떠있는 정도 설정
MaterialStateProperty로 넘겨줘야 합니다.
default 값은 6.0입니다.
SearchBar(
    trailing: [Icon(Icons.search)],
    elevation: MaterialStatePropertyAll(15),
  ),
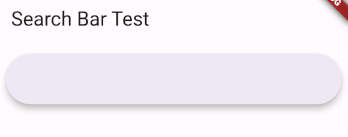
constraints 검색창 크기 설정
BoxConstraints를 이용해 최대/최소 크기를 설정할 수 있습니다.
default 값은 BoxConstraints(minWidth: 360.0, maxWidth: 800.0, minHeight: 56.0) 입니다.
SearchBar(
    trailing: [Icon(Icons.search)],
    constraints: BoxConstraints(maxWidth: 300, maxHeight: 100),
  ),
shape 검색창 모양 설정
검색창의 모양을 설정할 수 있습니다.
MaterialStateProperty를 사용해 OutlinedBorder를 리턴해줘야 합니다.
SearchBar(
    trailing: [Icon(Icons.search)],
    shape: MaterialStateProperty.all(ContinuousRectangleBorder(
        borderRadius: BorderRadius.circular(20))),
  ),
side 검색창 아웃라인 설정
검색창의 아웃라인 색상, 두께 등을 설정할 수 있습니다.
MaterialStateProperty를 사용해 BorderSide를 리턴해줘야 합니다.
SearchBar(
    trailing: [Icon(Icons.search)],
    side: MaterialStateProperty.all(
        BorderSide(color: Colors.red, width: 3)),
  ),
textStyle 텍스트 스타일 설정
MaterialStateProperty를 사용해 TextStyle을 리턴해줘야 합니다.
SearchBar(
    trailing: [Icon(Icons.search)],
    textStyle: MaterialStateProperty.all(TextStyle(
        color: Colors.purpleAccent, fontWeight: FontWeight.bold)),
  ),
padding 내부요소 패딩 설정
검색창 내부의 입력창, leading과 trailing에 대한 패딩을 설정해 줄 수 있습니다.
MaterialStateProperty를 사용해 EdgeInsets를 리턴해줘야 합니다.
SearchBar(
    trailing: [Icon(Icons.search)],
    padding: MaterialStateProperty.all(EdgeInsets.all(20)),
  ),
hintText 힌트텍스트 설정
유저가 검색어를 입력하기 전, 검색창에 대해 설명해주는 힌트 텍스트를 입력하고 설정할 수 있습니다.
hintText에는 String을 넣어줘야합니다.
hintStyle은 없어도 되며, 설정을 원한다면 MaterialStateProperty를 사용해 TextStyle을 리턴해줘야 합니다.
SearchBar(
        trailing: [Icon(Icons.search)],
        hintText: "검색어를 입력하세요",
        // hintStyle: MaterialStateProperty.all(TextStyle(color: Colors.grey.shade400)),
      ),
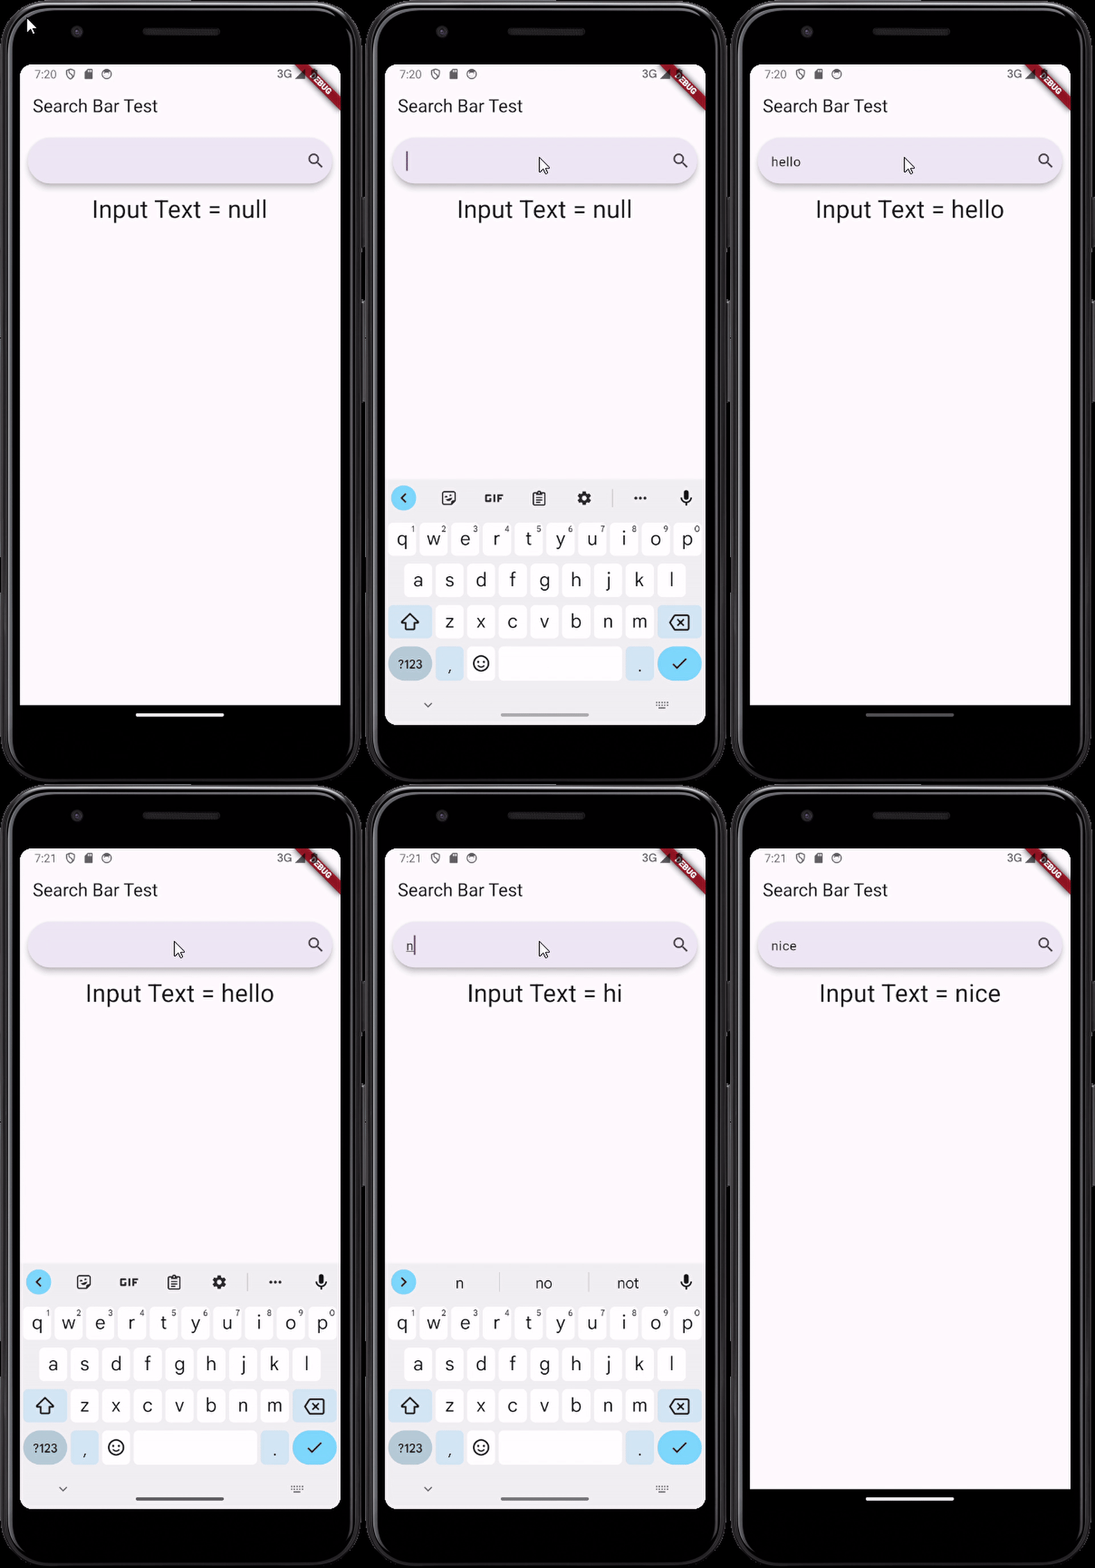
onSubmitted 검색어 작성을 완료한 이후의 함수실행 설정
유저가 검색어 작성을 완료하였을 때, 작동시킬 함수를 설정할 수 있습니다.
시각적으로 보여드리기 위해 StatefullWidget으로 변경하였습니다.
(그리고 테스트용으로 inputText라는 변수를 추가했습니다.)
import 'package:flutter/material.dart';

class TestScreen extends StatefulWidget {
  const TestScreen({super.key});

  @override
  State<TestScreen> createState() => _TestScreenState();
}

class _TestScreenState extends State<TestScreen> {
  String? inputText;

  @override
  Widget build(BuildContext context) {
    final ThemeData themeData = ThemeData(useMaterial3: true);

    return MaterialApp(
      theme: themeData,
      home: Scaffold(
        appBar: AppBar(title: const Text('Search Bar Test')),
        body: Column(
          children: [
            Padding(
              padding: EdgeInsets.all(10.0),
              child: SearchBar(
                trailing: [Icon(Icons.search)],
                onSubmitted: (value) {
                  setState(() => inputText = value);
                  print('Input Text = $inputText');
                },
              ),
            ),
            Text("Input Text = $inputText", style: TextStyle(fontSize: 30))
          ],
        ),
      ),
    );
  }
}
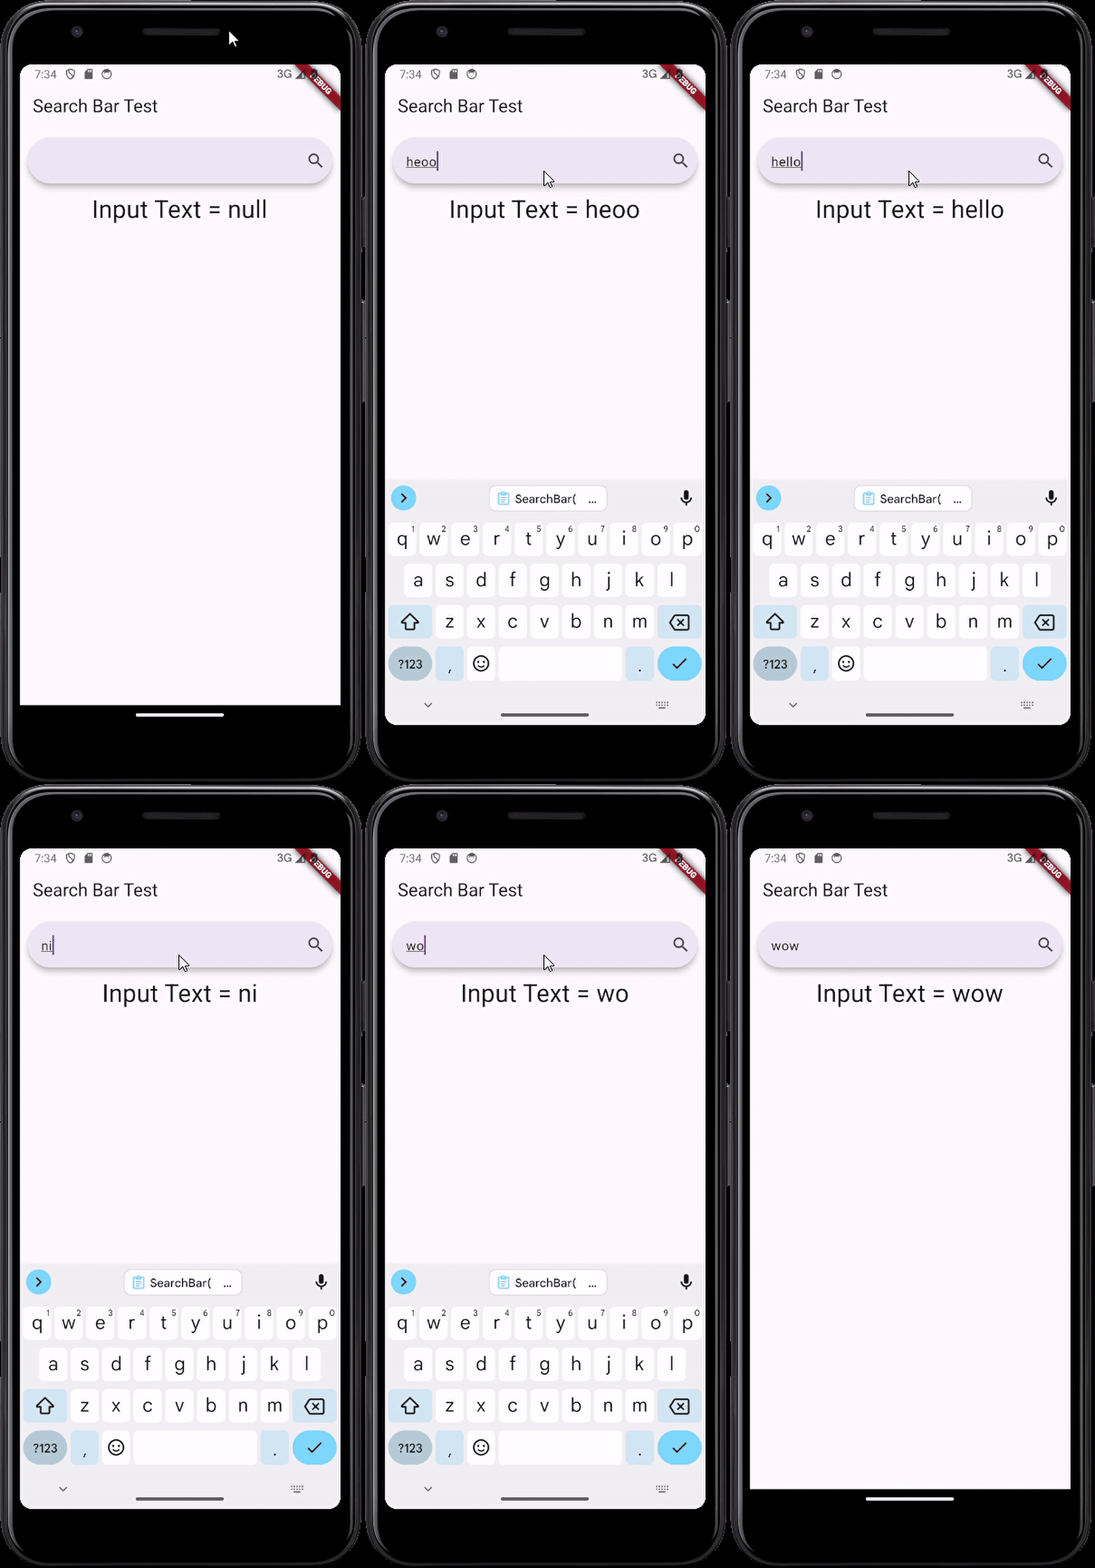
onChanged 검색어 작성 중 텍스트가 변경된 경우 함수실행 설정
유저가 검색어 작성을 하고 있을 때,
유저의 검색어 입력내용에 따라 그때그때 다르게 반응해줘야 할 수도 있습니다.
(연관검색어 리스트를 보여줄 경우 그럴 수 있겠습니다.)
이 때에도 onSubmitted와 동일한 방식으로 작동시킬 함수를 설정할 수 있습니다.
SearchBar(
        trailing: [Icon(Icons.search)],
        onChanged: (value) {
          setState(() => inputText = value);
          print('Input Text = $inputText');
        },
SearchAnchor 이용해서 추천검색어 리스트 보여주기
SearchBar 위젯을 SearchAnchor로 감싸면 다양한 것들을 할 수 있는데,
그 중 대표적인 것이 추천검색어 리스트 보여주기 입니다.
Column(
  children: [
    Padding(
      padding: const EdgeInsets.all(8.0),
      child: SearchAnchor(
        builder: (context, controller) {
          return SearchBar(
            trailing: [Icon(Icons.search)],
            controller: controller,
            onTap: () => controller.openView(),
            onChanged: (_) => controller.openView(),
            onSubmitted: (value) {
              setState(() => inputText = value);
            },
          );
        },
        suggestionsBuilder: (context, controller) {
          return [
            ListTile(
              title: const Text("추천검색어1"),
              onTap: () {
                setState(() => controller.closeView("추천검색어1"));
              },
            ),
            ListTile(
              title: const Text("추천검색어2"),
              onTap: () {
                setState(() => controller.closeView("추천검색어2"));
              },
            ),
          ];
        },
      ),
    ),
    Text("Input Text = $inputText", style: TextStyle(fontSize: 30))
  ],
),
반응형'Programing > Flutter' 카테고리의 다른 글